
Get Rook's Armour to the Team Before They Split Up
On this page
Put Rook’s armour where teammates can collect it before they leave to set up elsewhere. Early distribution gives the gadget a chance to help the whole defence. This guide covers Rook’s Armor Pack on PC in Rainbow Six Siege X’s standard 5v5 rounds.
Drop the pack before the team disperses
Rook is a defender who supports the team with his R1N RHINO armour. He deploys an Armor Pack that teammates can collect plates from. Place it during the preparation phase so they can equip before moving away. Rook’s role and armour distribution
Choose a floor spot near the team’s starting activity that is easy to reach. Avoid making teammates squeeze around you or cross an exposed doorway to collect. Use the positions of your current team, rather than assuming the same corner is always the best choice.
Deploy the pack with your configured gadget control, then tell teammates where it is. Do this before leaving for another preparation task. A brief location call is more useful while everyone is nearby than after they have spread across the building.
Know who still needs to interact
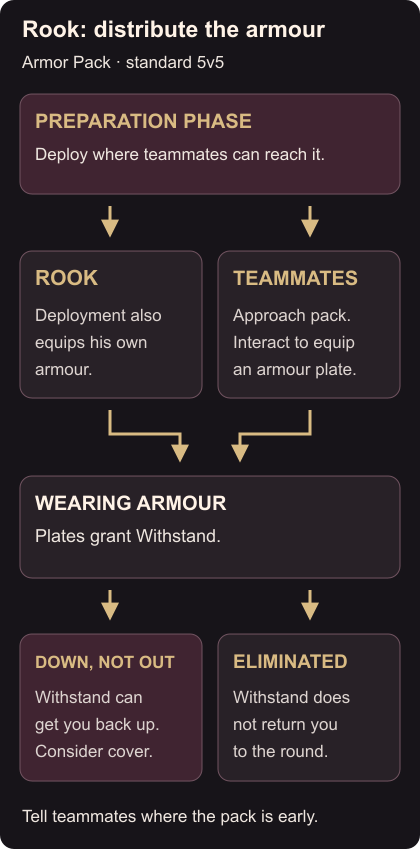
Rook equips his own armour as part of deploying the pack. He doesn’t need to return for a separate pickup. Other teammates collect theirs from the pack. Rook’s combined deploy and equip
As a teammate, approach the pack and use the displayed interaction to equip a plate. Let the action finish before moving away. Make collecting it part of your preparation sequence instead of leaving it for a rushed return later.
Once the pack is accessible and teammates know about it, return to your other setup tasks and intended defensive position. You don’t need to stand beside the bag for the whole round. If someone misses it, remind them where it is, but don’t encourage a dangerous journey back once attackers are applying pressure.
Use Withstand from a downed state
Armour plates grant Withstand. A wearer who is down but not out can use it to get themselves back up. This applies to the downed state; it does not bring an eliminated player back into the round. Withstand implementation and how Withstand works
If that opportunity appears, consider nearby cover and whether a teammate can protect you while you use it. After getting up, reassess the enemy’s direction and your route to cover before immediately returning to the same exposed fight. Treat the recovery as another decision to make, not a promise that an opponent will let you escape.
Practise the distribution first
In a quiet custom session with a willing teammate, deploy the pack and observe Rook’s combined action. Have your partner collect a plate and become familiar with the interaction before trying it under live pressure.
After a round, check whether teammates reached the pack before splitting up and whether its position made collection awkward. Adjust the drop timing or location next round.
While defending, keep watching for new sightlines. The Sledge soft-breach guide and Thermite wall guide explain how attackers can create them.