
Repair Generators and Land Consistent Skill Checks
On this page
Repair generators with a way out already in mind. In Dead by Daylight’s standard 1v4 survivor matches on PC and console, the team must finish five of the seven generators to power the exit gates. Start with ordinary repairs and consistent skill checks before adding a toolbox or a complicated perk setup. Generator objective
Choose your repair position
Walk to an accessible side of an unfinished generator and use the Repair interaction. An obstructed side cannot take another survivor. Before committing, look at the approaches you can see and pick nearby cover you could move toward if the Killer arrives. Repair interactions
Keep that exit simple. A route you have actually looked at is more useful than a vague plan to run somewhere when the heartbeat gets louder. If the other side of the generator gives you a clearer view, consider moving before you settle into the repair.
Check your displayed interaction and skill-check bindings before a match. Controller layouts and remapped controls can differ, so learn the action names instead of relying on someone else’s button labels.
Time the check you actually see
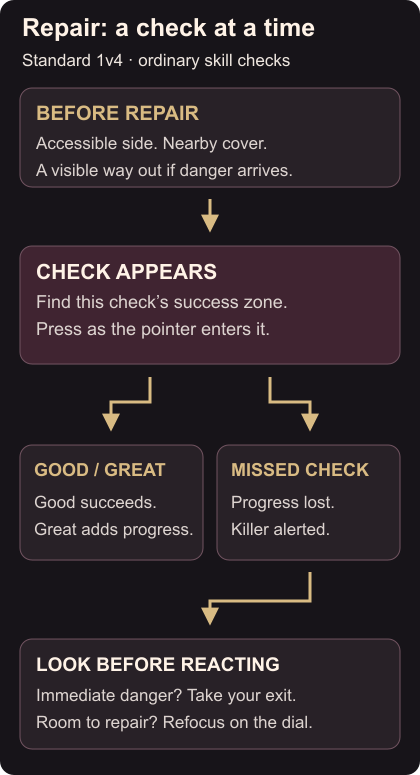
An ordinary skill check gives a sound cue before a pointer moves around a dial. Press the displayed Secondary Action when the pointer reaches the success zone. The zone can appear in different positions; find it on each check. Good succeeds, while Great adds repair progress. Skill Checks
Keep your hand ready while repairing. Use the sound as a reminder to focus, then watch the pointer and zone together. Aim for a comfortable Good result first. Trying to force Great on every attempt is a poor trade if it makes you miss the whole zone.
Between checks, glance at the nearby approaches. When a dial appears, give it your attention again. Avoid turning that into a memorized rhythm: perk effects can change the checks, and the next one may arrive sooner than you expect.
Recover from a missed check
A failed ordinary generator check removes progress and gives the Killer a noise notification. Take a moment to look around instead of immediately sprinting away or stubbornly continuing while the Killer closes in. Failed checks
If there is immediate danger, use the exit you picked. If the Killer is elsewhere and you can continue, return your attention to the repair. Leaving does not itself erase all your work; existing progress remains unless damage or another regression effect removes it. Generator progress
On your next check, correct one identifiable mistake. An early press needs a little more patience. A late press needs earlier attention to the zone. Looking away at the cue calls for a better scanning habit. Changing everything at once makes it harder to notice what helped.
Decide whether to finish together
Another survivor can help finish the same generator faster, although two people do not simply double its repair speed. Cooperative repairs Consider the immediate job: completing a nearly finished generator may be useful, while joining someone on fresh repairs also leaves fewer people doing other work.
For your escape from the repair position, use the movement and window guide. If a teammate needs help before returning to work, Heal, Mend or Recovery explains which interaction fits their condition.