
Aim Better in Ground Arcade and Find a Shot That Can Penetrate
On this page
Use Ground Arcade’s aim assistant to choose a promising shot, then check what the shell actually did. For early tanks in the PC game, learning one opponent’s armour and internal layout is more useful than firing repeatedly at the same patch.
Read the colour before firing
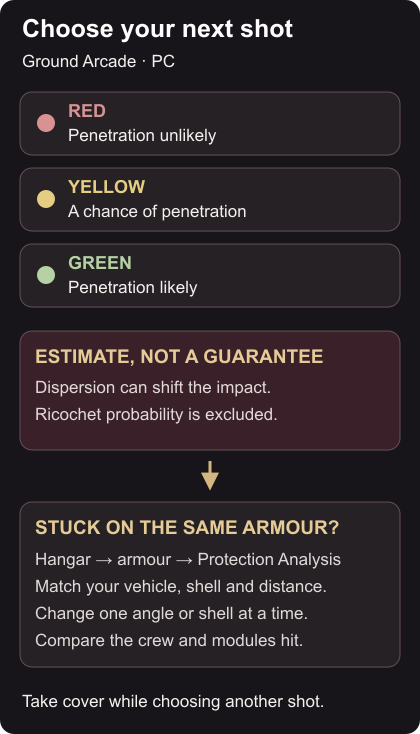
The crosshair estimates impact at the gun’s current elevation. Red means penetration is unlikely, yellow means there is a chance, and green means it is likely. Shell dispersion can shift the actual impact. The estimate considers angled armour thickness and penetration at that distance, but excludes ricochet probability. Arcade aim assistant
Confirm which shell is loaded. Enter gunner view, choose a visible armour area and let the aim settle before firing. Start with an opponent whose position is easy to follow. Sweeping the pointer across the whole vehicle while shooting makes it harder to tell which area your round reached.
If the marker stays red, look for another visible area or a better firing angle. Keep nearby cover within reach while deciding. Spending several seconds exposed to find a tiny green spot gives the opponent time to answer. Against a moving tank, watch where the shot goes and adjust for its movement before trying again.
Recreate the difficult shot in the hangar
Select the target vehicle in the hangar, enable armour view and open Protection Analysis. Choose your attacking vehicle, its shell and a shot distance. The cursor and viewing angle determine the impact being examined; the result includes potential damage to modules and crew. Use X-ray to understand the internal layout. Protection Analysis
Try this short comparison:
- Choose the opponent that stopped your last round. Match the attacking tank and ammunition to what you used.
- Set an approximate encounter distance. Examine the area you tried to hit.
- Keep the shell and distance unchanged, then rotate the view slightly. Compare the result at the same area from the new angle.
- Return to the original angle before comparing another shell you can actually load.
Change one setting at a time. Otherwise, you can find a better result without understanding whether the shell, distance or angle caused it. Pick one area you could recognise during a match, and notice which crew or modules sit behind it.
Protection Analysis lets you explore shell, armour and angle combinations in the hangar. Developer explanation Use that knowledge to choose a shot that fits the view you have. A remembered point is little help when the opponent has turned or hidden it behind cover.
Read the result before the next attempt
After a disappointing shot, check the visible hit feedback. Did you miss the intended area, fail to penetrate, or get through without disabling what you hoped to hit? Those call for different adjustments. Move back into cover if you can before spending time deciding.
If the return shot damages your tank, use the Ground Arcade repair guide to work out what needs attention. For a flying target in a separate Air Arcade match, follow the Air Arcade gunnery guide.
After the battle, keep one short note: target, shell, firing angle and observed result. Use the next hangar comparison to answer the specific question that shot left you with.