
Minecraft Mining Guide: From Stone Tools to Diamonds
On this page
For unmodded Java and Bedrock Survival in an ordinary generated Overworld. Establish a shelter and food supply first. This route takes you from a wooden pickaxe to stone, then iron, then your first diamond pickaxe.
Make the tools that can collect the next ore
Break logs, turn them into planks, and make a crafting table from four planks in a 2×2 square. Two planks stacked vertically make four sticks. Place the table and use its 3×3 grid for your pickaxes.
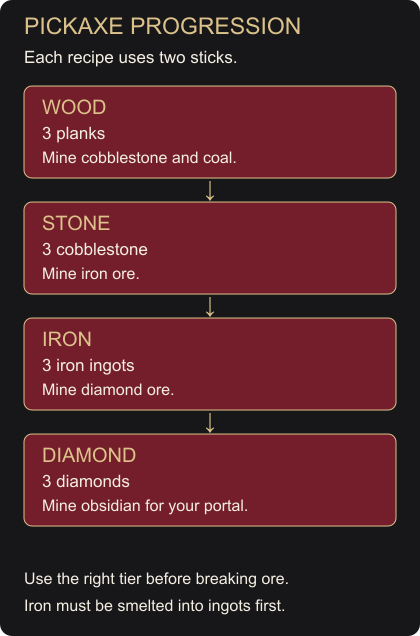
Every pickaxe in this route has the same shape: three head materials across the top, then one stick in the centre of each row below.
| Pickaxe | Head materials, plus two sticks | What it unlocks in this route |
|---|---|---|
| Wooden | Three planks | Mine stone for cobblestone |
| Stone | Three cobblestone | Mine iron ore for raw iron |
| Iron | Three iron ingots | Mine diamond ore for diamonds |
| Diamond | Three diamonds | Collect obsidian for a Nether portal |
Make a wooden pickaxe, mine three cobblestone, then craft the stone pickaxe. Mine another eight cobblestone for a furnace. These are separate crafts, so budget eleven cobblestone in total.
Use the stone pickaxe when you find iron. Breaking an ore block does not guarantee its drop: the tool must meet that ore’s requirement. A wooden pickaxe cannot collect iron, and a stone pickaxe cannot collect diamonds. Copper tools are an optional intermediate choice; this route goes directly from stone to iron.
Find iron and smelt your first ingots
Look for accessible iron in exposed rock or a shallow cave entrance before committing to a deep expedition. If you are digging specifically for it, around Y=16 is a useful underground target. Iron also generates higher in mountains, so your local terrain may offer an easier route.
Mine the ore with the stone pickaxe and take the raw iron home. Craft a furnace with eight cobblestone around an empty centre. Put raw iron in the top input slot and fuel below it; each raw iron produces one ingot. Collect three ingots and make the iron pickaxe before spending your supply on other equipment.
Coal and charcoal both work as fuel. To make charcoal, smelt a normal tree log; two sticks fuel one log. Keep some logs uncrafted. Coal generates above Y=0, so carry enough light into the deep layers instead of expecting to replenish it there.
An optional next craft is a bucket: put three iron ingots in a V shape, with one at each top corner and one below them in the centre. Fill it from water before an Overworld mining trip. Take food, torches, spare blocks, wood and at least one spare pickaxe as well.
Record your route before descending
Coordinates use X and Z for horizontal position and Y for height. Record your shelter and mine entrance, including the signs of any negative numbers.
- Bedrock: enable Show Coordinates under Settings → Game.
- Java: press F3. If the position display is hidden, open Debug Options with F3 + F6 and enable it.
Dig a staircase you can walk back up. Break and inspect the blocks ahead before stepping forward; never stand on the block you are removing. Light the route and mark junctions. Pick a consistent convention, such as placing your route torches on the right-hand wall while descending, then following them on your left when returning.
Stop when an opening reveals deep drops, heavy mob activity or a flooded cave. Block off the opening and choose another direction. A tunnel that remains easy to retrace is more useful than a shortcut you cannot safely reverse.
Start a deep diamond tunnel
Diamond ore generates below Y=16 and becomes more common deeper down. Y=-58 is a practical starting level for a diamond tunnel in modern world generation. It is not a guaranteed vein location; the layout depends on your world.
At your chosen level, dig a main tunnel two blocks high, then short side branches. Return to the main tunnel after each branch so the route stays readable. Light the tunnels as you extend them, and turn back while you still have food, torches and a usable pickaxe.
Deep mining can uncover lava. Keep spare blocks ready, stand back from new openings and block a leak before continuing. If a cave or lava pool makes a branch awkward, abandon that branch. You can start another without risking the whole trip.
Collect the diamonds and bring them home
When you see diamond ore, inspect the neighbouring space before breaking it. Make a stable place to stand and deal with exposed lava that could catch either you or the drops. Switch to your iron pickaxe, mine the ore and collect the diamonds.
Once you have three diamonds, return home and put spare valuables in a chest. A chest uses eight planks around an empty centre. Craft the diamond pickaxe with three diamonds and two sticks in the familiar pickaxe layout. That completes the mining progression needed for the obsidian route to your first Nether portal.
When a trip goes wrong
| Problem | Recovery |
|---|---|
| Wrong pickaxe selected | Stop before breaking valuable ore and switch to the correct tool. A destroyed block’s missing drop cannot be recovered. |
| Pickaxe nearly broken | Use the spare or return home while your route is still passable. |
| Lost at a junction | Backtrack to your last recognised marker and compare coordinates. |
| Lava or flood ahead | Block the opening from safe ground and retreat; choose another branch. |
| Death | Use the backup kit at your shelter and retrace your route. Dropped items have a five-minute window while their area is loaded, and lava may already have destroyed them. |
Keep going
Independent fan guide. Not an official Minecraft product; not approved by or associated with Mojang or Microsoft.