
Extract From Operations Without Gambling Your Next Loadout
On this page
Plan an Operations exit before you fill your backpack. Standard extraction puts the ordinary equipment you deploy at risk; useful loot only helps the next run if you bring it home or place an eligible item in protected storage. Operations basics
Keep the next loadout affordable
Choose a kit you can replace. Check the equipped weapon’s calibre against your ammunition, bring recovery supplies and leave space for loot. Move spare equipment into stash storage before readying up. A valuable item left in your equipped backpack is still coming into the next match with you.
Set one modest task with your squad. It is easier to agree on leaving after that task than to keep adding another building, another fight and another detour. Use the first-session guide if you still need to settle your controls or loadout.
Read the extraction condition
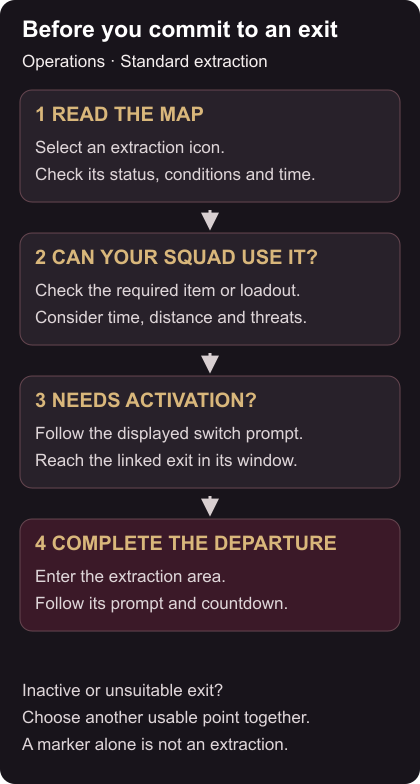
After insertion, open the map with your assigned Map control. Select an extraction icon, read its status and requirements, then compare those with the match timer and your squad’s position. Mark your intended exit so everyone knows where you plan to go. Extraction and switch points can be marked even within signal-jamming zones. Map marker details
An exit may have a condition, need a lever or only be randomly active. A conditional point might require a specific item, a weight limit or backpack removal. If it asks for your backpack, compare losing those contents with reaching another usable exit; do not discard it merely because a guide mentions that type of extraction. Extraction types and conditions
For a lever exit, use the displayed switch marker and interaction prompt, then reach the linked extraction zone during its available window. Pulling the lever does not remove you from the map. Once at your exit, satisfy its prompt and stay in the extraction area for the countdown and successful departure. An icon on the map is not confirmation that you have escaped.
Keep a fallback in mind. Judge it by the time left, conditions you can meet and enemy pressure you have actually seen. If your planned exit is watched, tell your squad before changing direction. No alternate route is automatically safe.
Protect loot and treat the right problem
Use available Safe Box slots for eligible valuable items. Those contents remain protected if you die, but the box does not insure your ordinary equipped kit. Read restrictions if an item will not go inside: some ammunition is specifically excluded. Safe Box restrictions
If health keeps draining, check for bleeding; a bandage or tourniquet treats it. A fracture needs a Surgical Kit. Read the injury and item description before using supplies, then recover from cover. Injuries and their treatment
Leave before one more search costs the run
Other Operator squads, mercenaries and bosses share the map. You do not need to fight every threat to finish your task. Operations opponents
Stop searching when your task is done, supplies run low or the remaining time makes another stop awkward. Back in the stash, unload your loot before deploying again. Keep items needed for missions, replace spent ammunition and medicine, and check your armour’s condition. Extracted supplies can be used in later matches or sold. Keeping extracted supplies
For repeated objective fights with a larger team, see Warfare objectives and teamwork.